This is a quick helper guide on how to set up Setup Imap Emails on IOS devices such as an iPhone, iPad, or a Mac. Here we will walk you through each section to help you get up and running with your New Emails and or Devices.
Setup Imap Emails on IOS/iPhone/iPad/iOS
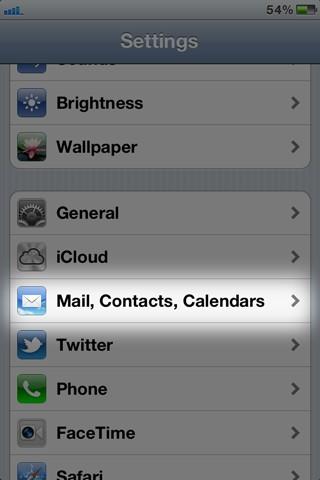
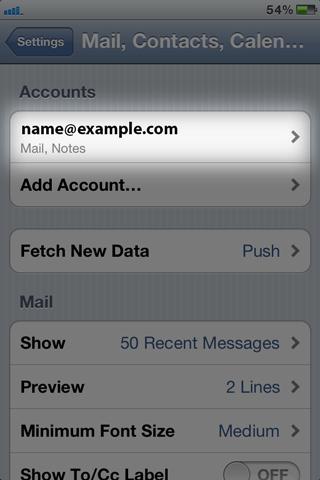
Tap Settings and move down to Mail, Contacts, Calendars.
Tap Add Account….

Tap Other.

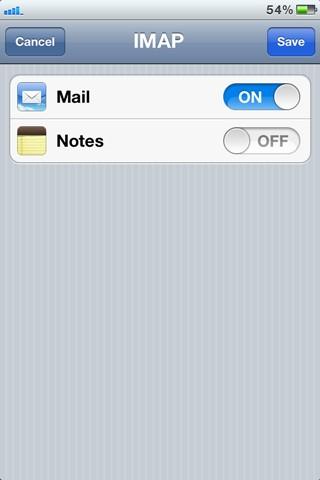
Select Add Mail Account.

Enter your Name.
Enter your Email e.g. name@example.com, example.com being your domain hosted by Midgard.co.uk
Enter a Description e.g. name@example.com.

Highlight the IMAP tab.
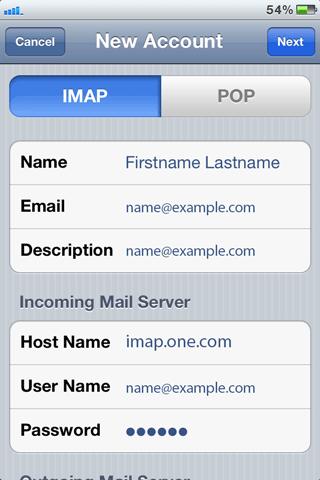
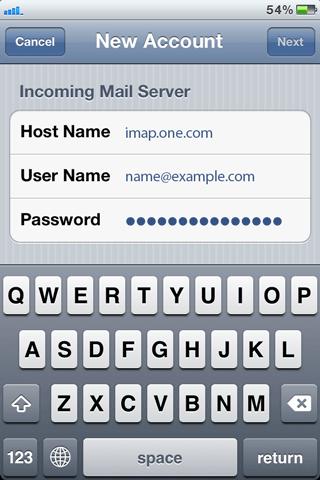
For Incoming Mail Server enter mail.yourdomain as Host Name, example.com being your domain hosted by Midgard.
Enter your full email address as User Name e.g. name@example.com.
Enter your Password that you were provided with for the email account.
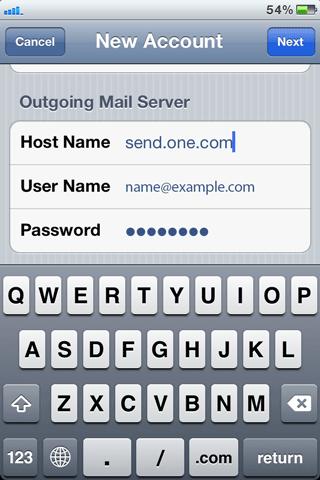
For Outgoing Mail Server enter mail.yourdomain as Host Name.
Enter your full email address as User Name e.g. name@example.com.
Enter the same password as your incoming.
Please note that even though the field says Optional you need to fill it out.
Tap Save again.
Tap the mail account you just created.
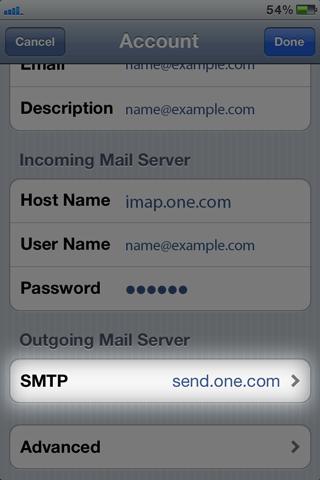
Tap the Account field.

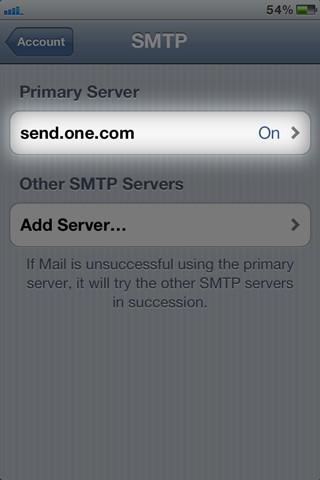
Tap SMTP in the Outgoing Mail Server field.
Tap mail.yourdomain in the Primary Server field.
For Host Name enter mail.yourdomain
Enter your full email address as User Name e.g. name@example.com.
Enter your Password.
Use SSL should be set to ON.
Authentication should be set to Password.
In Server Port, you should use port 25. To verify the information, tap Done and then Account.

Move down to Use SSL for Incoming Settings, and slide to ON.
Set server port to 143.

Use SSL is now set to ON.

The next step is to synchronize Mailbox Behaviours with the server, to make sure that your Emails are saved both on the device and on the server.
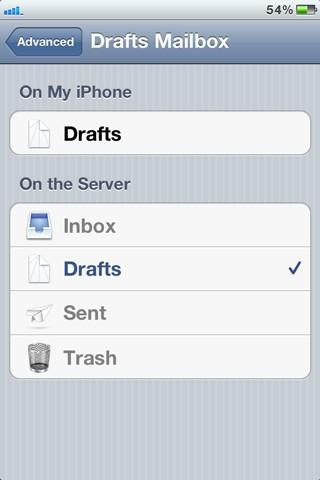
Tap Drafts Mailbox.
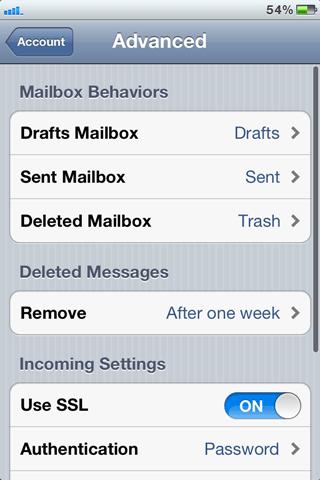
Tap Drafts in On the Server field. Go back by clicking on Advanced, and do the same for the other mailboxes. Sent Mailbox should be set to Sent in the On the server field, and the Deleted Mailbox should be set to Trash in the On the server field.
To complete the setup, tap Account and Done. You have now Setup Imap Emails on IOS Device
Contact For Support
If you are having issues setting up your Midgard Emails, or even Emails from other providers, contact us for our support via Email or Telephone. You can fill out our online ticket support here
You can also fill in our Contact Form here.
Any questions or changes you would like to see made to this “How To” please leave a comment below.